-
Our Kitchen Backsplash is Finally Installed

As you may know we have three other backsplash inspiration but after almost two months of waiting since we purchased our backsplash of choice, last weekend we were finally able to do the grouting to finish off the kitchen backsplash installation.
We (The Mr. and I) wanted to tackle this project when both of us have at least two days off. We started it two weeks ago with the mortar and tile installation.
We are so happy with the result. It is very important to turn off all the electrical power of all the outlets before starting.
Luckily for us, the wet tile saw and some of the tools, we were able to borrow from friend and family. So that really saved us a lot of money. You might want to check out from family and friends if you can borrow some of these tools.
I may not be going to include a step by step instruction on how we did this because we basically followed Amy Matthews’s video tutorial in the very bottom video on how to do it.
It is the most detailed instruction that we have found when we were researching on the www. But you will see my DIY’ers Tips for this project based on our experience on this post.Plus I was not able to take photos during the process of installation because we were too busy arguing, lol!
I actually kidded my husband that we have surpassed the biggest test to our relationship. My advise: If you guys want to know if you’re relationship is strong enough. Do a project together. If at the end of the project you did not decide on getting a divorce, then your relationship is strong. lol!
Really, in all seriousness, at the beginning of the installation, The Mr. and I were arguing so much because we haven’t established our process who’s gonna do what.
DIY’er’s Tip: It is better to install the tiles with two sets of hands because while the other set of hands hold the tiles using float trowel to adhere it, the other set of hands can start the measurements for the next tile.
But after about a couple of tiles installed, we decided that while he cuts the tile to fit around the outlet, I will be putting the mortar on the wall just enough to attach the mosaic tile.
DIY’er’s Tip: Mortar dries very fast, so apply only on the wall that will approximately will adhere the size of your tile or your mosaic tile.
On the tutorial video above, it was mentioned to start the tiling in the center and work out, but we did not do that on ours. We started on the spot where we thought is the most difficult to work on with and hard to reach – and that is the middle corner, see photo below.
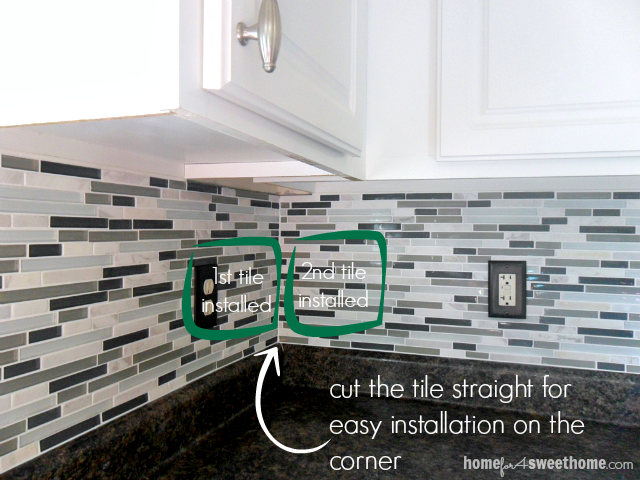
The Mr. cut the tile straight so we can easily install it on the corner then we work our way out.
And because we were able to establish what works for us, the rest was pretty much faster and smoother.
The next challenge was to work around an outlet. For whatever reason when we decided on how many outlets we wanted on the kitchen when this house was built, we have 8 outlets that we have to work around with. That was a challenge!
DIY’er’s Tip: When it comes to working your way around an outlet, we just made sure that switch plate will completely cover the tile. It wasn’t a big deal if it was straight or not as long as it will be eventually covered by the switch plates.
We decided to change the color of our switch plates to make it more dramatic and contemporary.
When we finally got to the end of the kitchen wall where we want our backsplash to end, we measured our statement piece that we haven’t installed yet but don’t worry you will see it here pretty soon, then bordered the bottom with vertical tile.
We waited for a week, then we grouted last weekend to finally finish this project off.
DIY’ers Tip: When mixing your grout, start with a small amount of powder estimating to cover at least a feet of your backsplash. That way you only have enough grout to last for 10-20 minutes because after that, the grout can be very difficult to apply as it may start to dry up and harden a little bit.
DIY’ers Tip: While the other set of two hands is applying the grout, after 10 minutes from when the grout was first applied, the other set of hands should start wiping off the grout clean using the sponge.
And there we have our newly installed kitchen backsplash!!!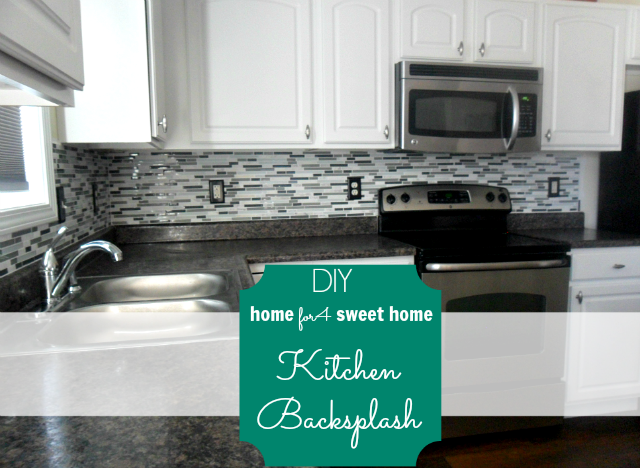
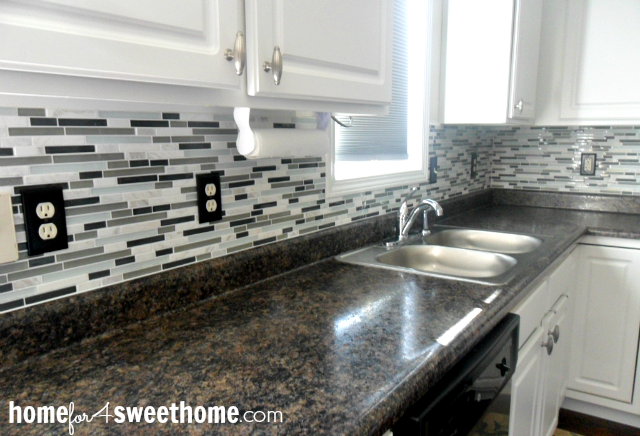 The best thing about this project is that when I’m doing the dishes, it doesn’t make me want to cry anymore. Remember my post about how the wall against the sink look like?
 It actually makes me want to sing and dance while doing the dishes!!!And how it used to look like before the backsplash is now part of the past.
 Because I am super happy with the result! So thankful also for The Mr.!!
 XOXO,
XOXO,
-
How to Naturally Clean & Polish your Stainless Steel Refrigerator
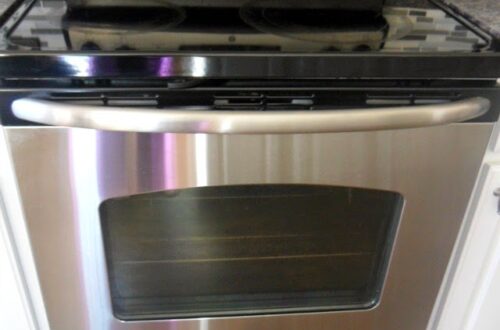
 Every January I always have the energy and motivation to do some deep cleaning and organizing. And there are a lot of exciting cleaning and organizing things that I will be sharing here in my blog.Today I will be sharing how to naturally clean and polish your stainless steel refrigerator.Stainless steel appliances adds a nice contemporary look to a kitchen. They are sleek and clean and supposed to be stainless. But that is not necessarily true.Because my stainless appliances are covered with streaks, smudges and fingerprints, little ones. Especially when you take a closer look at it.
 If you have kids like me (okay let’s not blame the kids on this but The Mr. and I are also guilty with this too), then your stainless appliances will look like mine as well.Let me share to you how I cleaned my stainless steel appliances, starting with my refrigerator.Normally, I would just use a damp paper towel and wipe off the prints and streaks on the refrigerator.Yeah it looks clean. Yeah it looks fingerprint free. Yeah no streaks. But I wasn’t able to achieve the shiny-look of my refrigerator.So here’s what I used to achieve that look.
 1. Gather your supplies: Grab four things – 2 clean microfiber cloths, vinegar, baking soda & olive oil. It is practical to pour your vinegar on a large spray bottle to be able to cover larger space.2. Spray the vinegar: Liberally spray your refrigerator with vinegar. Wipe the vinegar in the direction of your refrigerators grain using one of the microfiber cloths. Once you have done that.
 3. Remove smudge with baking soda: Depending on how smudgy your refrigerator is, pour a little bit of baking soda unto the microfiber cloth then scrub it in the direction of the refrigerator’s grain. Wash the same cloth with dish soap and water, wipe the refrigerator surface clean.4. Polish the refrigerator: Pour a pea size of olive oil onto your other clean microfiber cloth (remember: do not use the microfiber cloth that you used to wipe off the vinegar). Polish the refrigerator in the direction of its grain.
 And you will now have a clean and shiny stainless steel refrigerator!

 Come back for more exciting cleaning and organizing posts!For more cleaning and organizing posts, check my tabs on top of this page.
 -
Our Backsplash Choice
Not too long ago I posted about how it makes me want to cry when I see our wall above the sink without backsplash. Yeah, I am being dramatic about this whole thing, but my thought is we pay a whole lot of money for this house, then we need to keep this reliable, clean & beautiful.Easier said than done because, let’s face it, to achieve those three items, it cost money – they either come in small amount or large amount.Backsplashing is one of those home improvements that it is smarter to wait to really buy what you wanted, because it is an investment that increases the value of your home.Finally we have purchased the backsplash that The Mr. and I both like. We bought two boxes of this Allen + Roth Mosaic Wall Tile. The picture below is kind of lighter than the actual colors.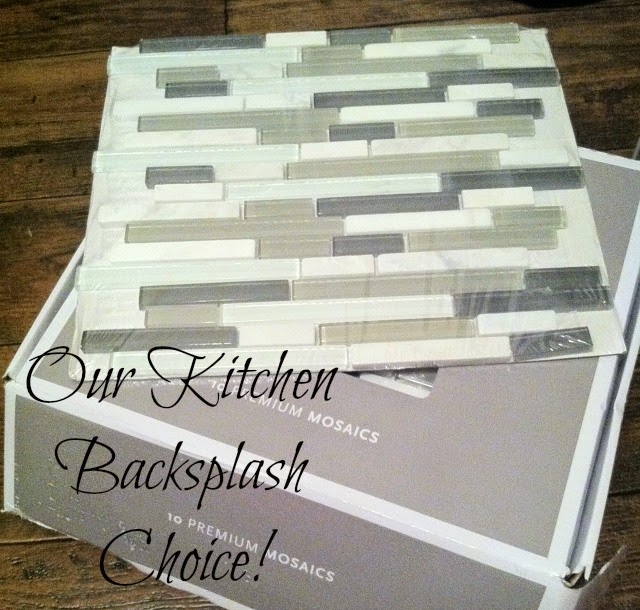 This is actually the fourth on the list of my kitchen backsplash inspiration.
 What I like about this backsplash is that it even with our white cabinets, it will add enough visual interest and lots of attention because of it its varying colors & sizes in the mosaic.Now I cannot wait to install this!!♥ I am super excited!!♥Until then…***Update 02/11/15: Our kitchen backsplash is finally installed, if you want to see it, click here.***

-
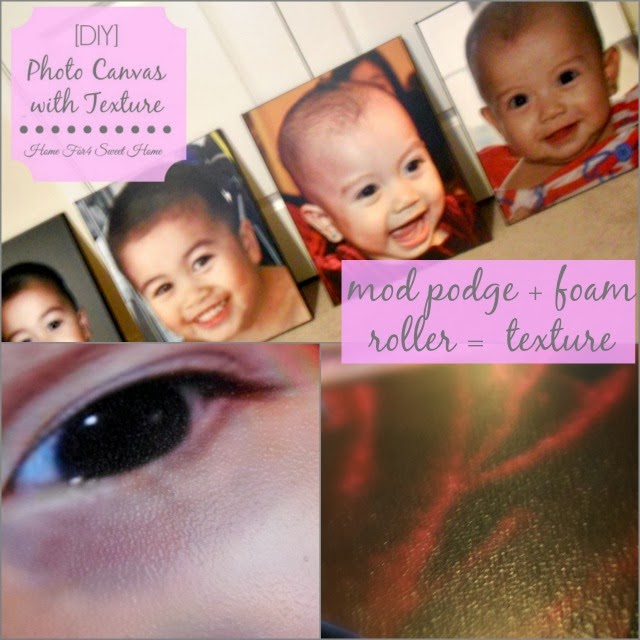
[DIY] Photo Canvas with Texture
A long time ago, I had a love-at-first-sight when I saw this beautiful room with large canvas photos from houzz.

Eclectic Living Room by Sandy Media & Bloggers Michelle Hinckley
I ordered my 16×20 enlarged prints from Sams Club for $5.96 each. Very impressed with the quality of it. And I got my canvases of the same size with my photos at Michael’s that were on sale for $4.99/2 canvases. So it’s like getting each canvas for $2.50, love sale!

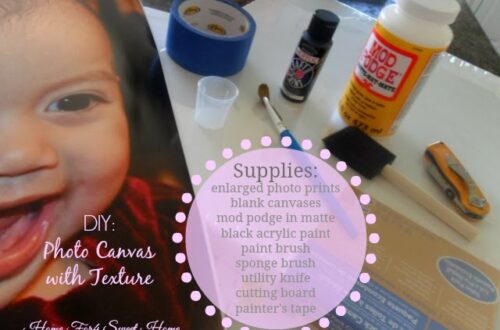
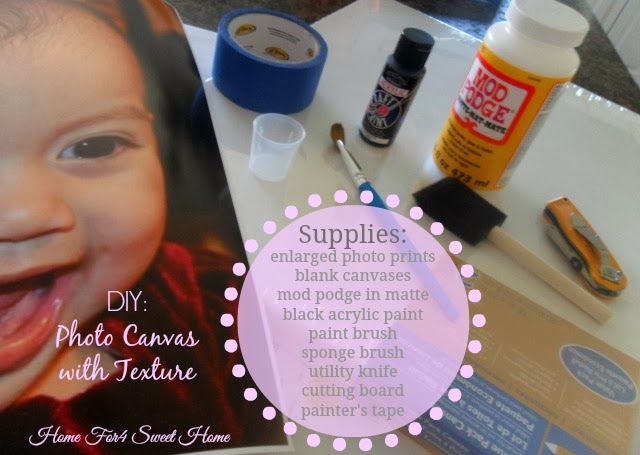
Not on the photo above, which is the most important thing to get the textured effect are these items.

Although I recommend for you to just go and read Carrie’s tutorial because it is very detailed, I had a slight variation in my own version.
Here’s my steps:
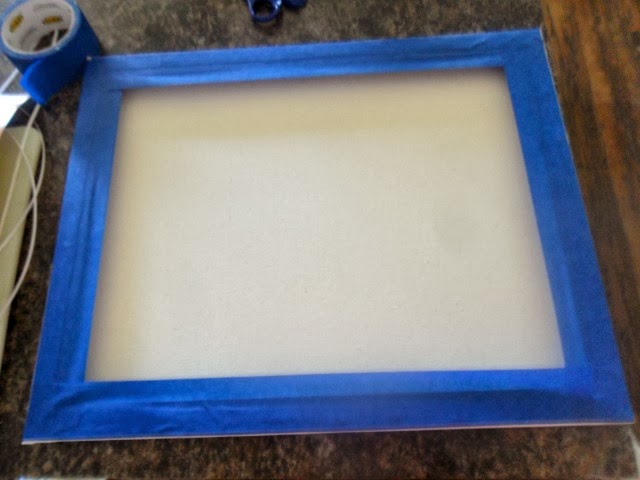
1) Put a painter’s tape on the back of the blank canvas to avoid overpaint. Although it may not be seen but the ocd in me just can’t stand the thought that the back of the canvas had overpaint.
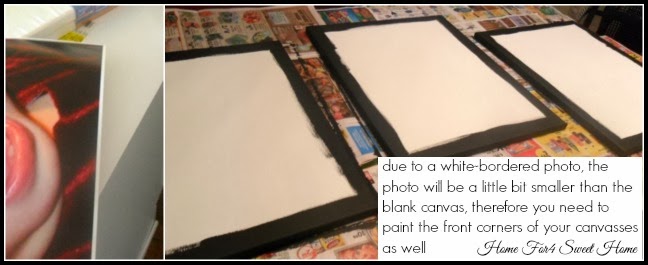
2) Paint the edges of the canvas all the way to the front corners of the canvas because my photo prints came in with white borders so it is going to be smaller than my canvas. Allow the paint to dry, I waited overnight on mine.
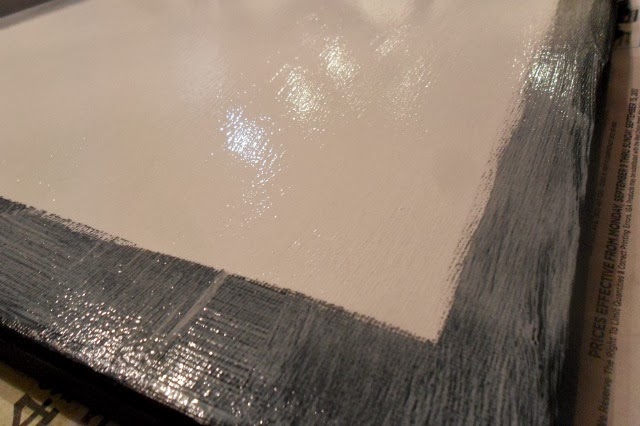
3) Once the paint is dry, you may now start putting a thin layer of mod podge to the blank canvas using the foam brush. Pay more attention on making sure that the edges & the corners of the canvas have mod podge.
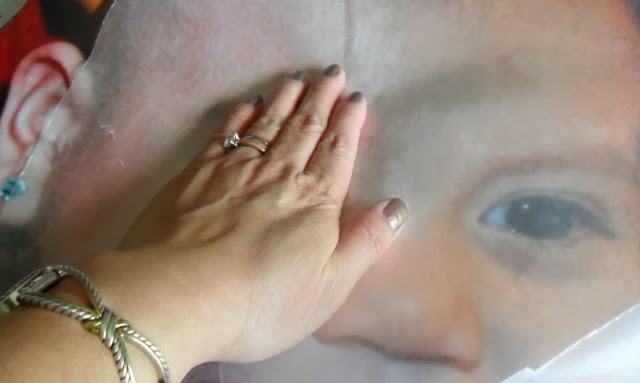
4) Allow the glue to breathe a little bit then you may now gently place your photo to still wet with mod podge canvas. Since I did not want any fingerprints on the photo, I used a wax paper while pressing down the photo to the canvas.
When the photo is all adhered to the canvas, I thought it was so beautiful already.
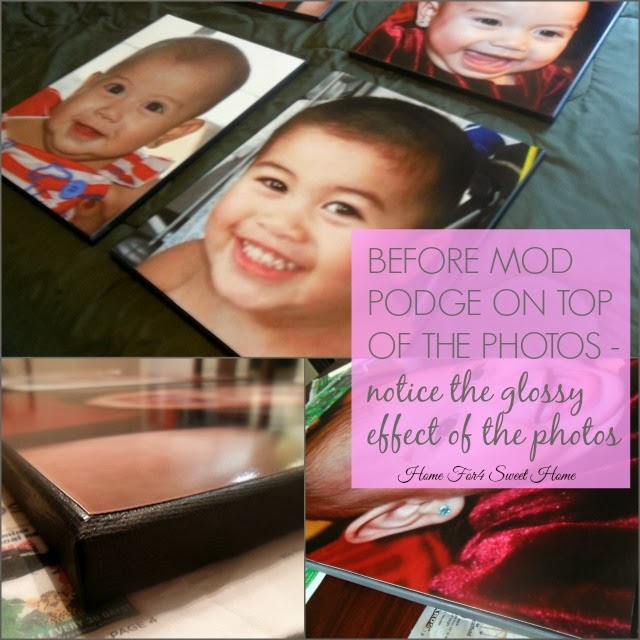
You might be tempted of stopping after this step – but please don’t – THE BEST IS YET TO COME.
**Allow the photos to sit overnight, I did not rush my process, because I wanted it to be perfect. So be patient.**
5) Finally, the fun part. Adding texture to the photos, to get that real canvas texture. Pour mod podge somewhere on top of the photo, then using foam brush, spread it all over the photo, sparing nothing. Just like the picture below.
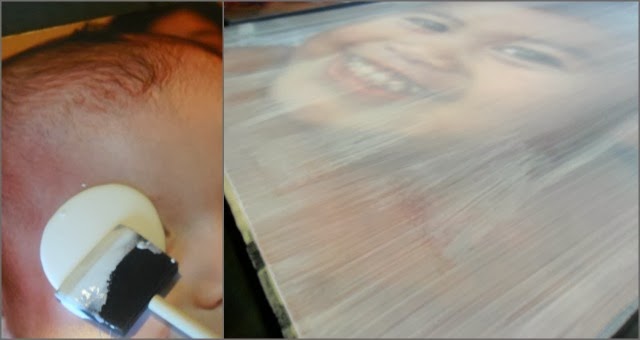
**Make sure that you are distributing the mod podge EVENLY all through out the photo.**
6) Quickly roll over the dry foam roller to the wet with mod podge photo. Make sure to only roll it over in one direction, if you want horizontal-keep horizontal or if you want vertical-keep vertical. Mine was only vertical direction. Roll your foam roller as much as you can to ensure that the mod podge is all the way spread out while gently pressing the foam roller at the same time.
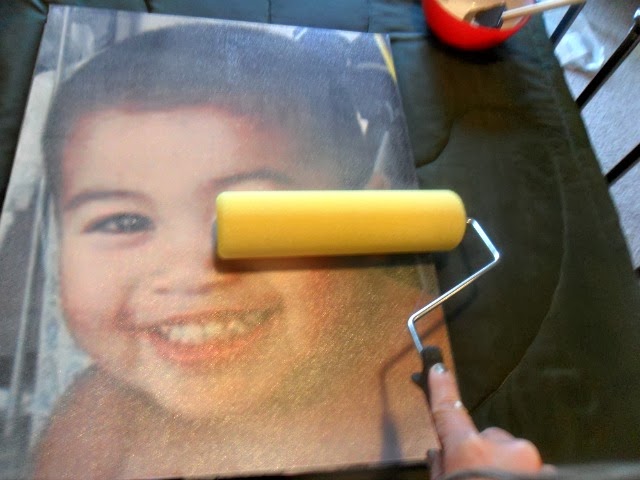
**Make sure that there is no debris trapped on your mod podge, no bubbles & no streaks, you want it to be flawless but milky.**
Here’s some photos for you to visualize what it should look like after foam rolling.

7) Allow the canvasses to dry. Once they are dry, you will be amazed how beautiful it all turned out!
Here’s mine look like once dried.


Now I’ve got to figure out where these babies need to go♥
All in all, I am impressed and then guess what? The Mr. is as impressed as me too! Spent about $10 on each photo canvas compared to $89.99 or even more to $450!
Thanks for reading and until then. XO.

| affordable fashion | organize | home | lifestyle | all things pretty | happiness | always thankful | kid stuff |