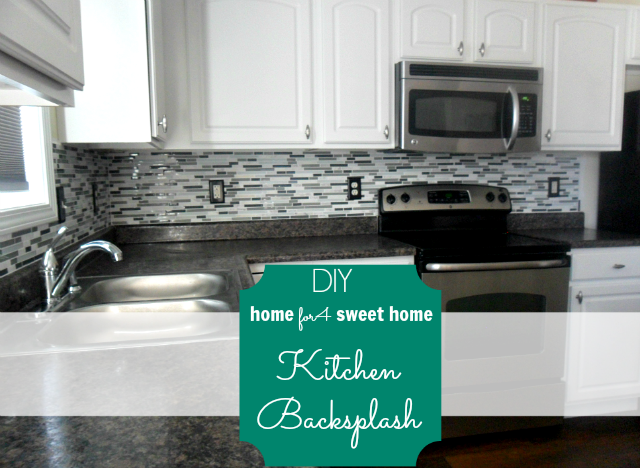
Our Kitchen Backsplash is Finally Installed

As you may know we have three other backsplash inspiration but after almost two months of waiting since we purchased our backsplash of choice, last weekend we were finally able to do the grouting to finish off the kitchen backsplash installation.
We (The Mr. and I) wanted to tackle this project when both of us have at least two days off. We started it two weeks ago with the mortar and tile installation.
We are so happy with the result.


Luckily for us, the wet tile saw and some of the tools, we were able to borrow from friend and family. So that really saved us a lot of money. You might want to check out from family and friends if you can borrow some of these tools.
I may not be going to include a step by step instruction on how we did this because we basically followed Amy Matthews’s video tutorial in the very bottom video on how to do it.
It is the most detailed instruction that we have found when we were researching on the www. But you will see my DIY’ers Tips for this project based on our experience on this post.
Plus I was not able to take photos during the process of installation because we were too busy arguing, lol!
I actually kidded my husband that we have surpassed the biggest test to our relationship. My advise: If you guys want to know if you’re relationship is strong enough. Do a project together. If at the end of the project you did not decide on getting a divorce, then your relationship is strong. lol!
Really, in all seriousness, at the beginning of the installation, The Mr. and I were arguing so much because we haven’t established our process who’s gonna do what.
DIY’er’s Tip: It is better to install the tiles with two sets of hands because while the other set of hands hold the tiles using float trowel to adhere it, the other set of hands can start the measurements for the next tile.
But after about a couple of tiles installed, we decided that while he cuts the tile to fit around the outlet, I will be putting the mortar on the wall just enough to attach the mosaic tile.
DIY’er’s Tip: Mortar dries very fast, so apply only on the wall that will approximately will adhere the size of your tile or your mosaic tile.

On the tutorial video above, it was mentioned to start the tiling in the center and work out, but we did not do that on ours. We started on the spot where we thought is the most difficult to work on with and hard to reach – and that is the middle corner, see photo below.
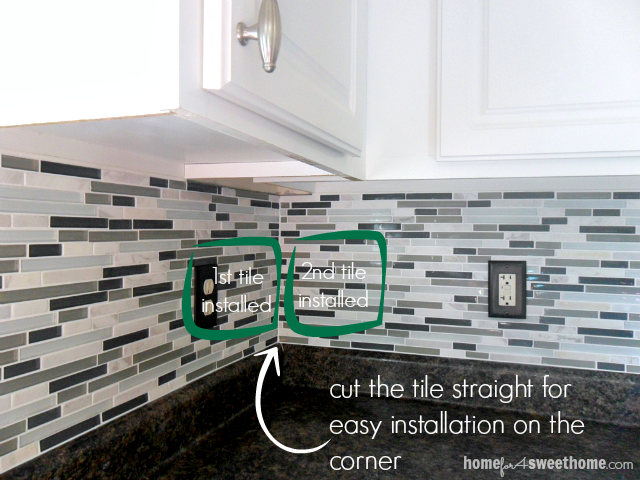
The Mr. cut the tile straight so we can easily install it on the corner then we work our way out.
And because we were able to establish what works for us, the rest was pretty much faster and smoother.
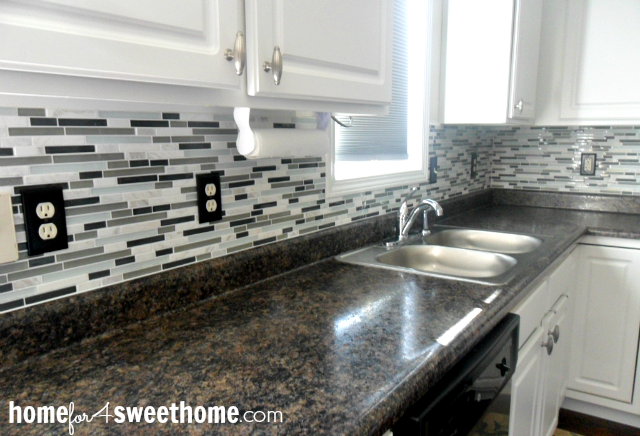
The next challenge was to work around an outlet. For whatever reason when we decided on how many outlets we wanted on the kitchen when this house was built, we have 8 outlets that we have to work around with. That was a challenge!

DIY’er’s Tip: When it comes to working your way around an outlet, we just made sure that switch plate will completely cover the tile. It wasn’t a big deal if it was straight or not as long as it will be eventually covered by the switch plates.
We decided to change the color of our switch plates to make it more dramatic and contemporary.
When we finally got to the end of the kitchen wall where we want our backsplash to end, we measured our statement piece that we haven’t installed yet but don’t worry you will see it here pretty soon, then bordered the bottom with vertical tile.

We waited for a week, then we grouted last weekend to finally finish this project off.
DIY’ers Tip: When mixing your grout, start with a small amount of powder estimating to cover at least a feet of your backsplash. That way you only have enough grout to last for 10-20 minutes because after that, the grout can be very difficult to apply as it may start to dry up and harden a little bit.
DIY’ers Tip: While the other set of two hands is applying the grout, after 10 minutes from when the grout was first applied, the other set of hands should start wiping off the grout clean using the sponge.
And there we have our newly installed kitchen backsplash!!!